How to launch your EC2 instance on AWS
Amazon EC2 is web service that provides organization to deploy their applications on compute available on web. With on demand scalable compute capacity organization can address scalability requirements. Amazon EC2 service offer customers with cost effective next generation compute platform without getting into complex process to run business applications.. This artefact covers basics scenario “how to setup your ec2 instance with basic networking using VPC service”
Please note this scenario is for beginners who are looking for configuration steps for EC2 and VPC
Scenario
VPC Public subnet
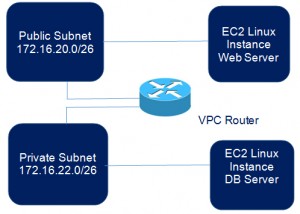
VPC Private subnet
To start with, it is recommend configuring VPC – virtual private cloud – service in order to launch EC2 instance. VPC service provide networking functions including private subnet, public subnets, NAT, routing to run application or compute in networked environment.
CONFIGURATION: VPC Configuration
- Launch Management Console (Child Account) and Select Networking Service: VPC

2. Delete default VPC
3. Go to the Your VPC Section and Create VPC with custom settings, click on Create VPC button on dashboard.
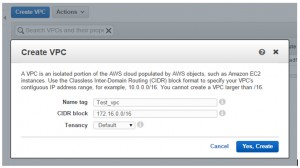
4. Define appropriate CIDR block (preferably /16). In this scenario we are using 172.16.0.0/16 block
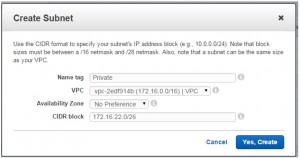
5. Click on Subnet option to create single subnet with CIDR /26 for single nodearchitecture (Single AZ deployment)
72. Public subnet 172.16.20.0/26
73. Private subnet 172.16.22.0/26
Note: Instances assigned to public subnets VPC can be accessed from internet in order to manage resources or publish services on internet

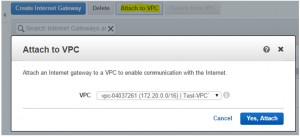
6. Click on Internet Gateway option to create Internet Gateway (igw) to route the traffic to internet router (configuration done on initialization)
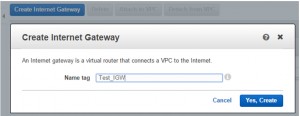
7. Attach newly created Internet Gateway to your VPC
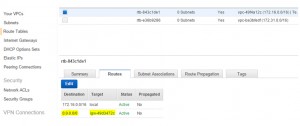
8. Add default route entry against associated route table with the subnet.
We are done with VPC configuration and now we will proceed further with EC2 configuration.
CONFIGURATION: EC2 Standard AMI Deployment
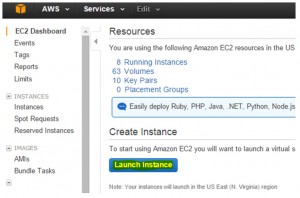
Step 1. Go to the EC2 Dashboard and click “Launch Instance”.
Step 2. Choose an AMI (Amazon Machine Image) as per your requirement. In that we have use Linux AMI.

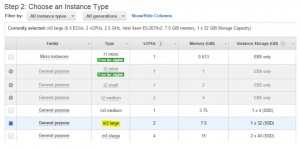
Step 3. In this step select Instance Type necessary for your environment and click next.
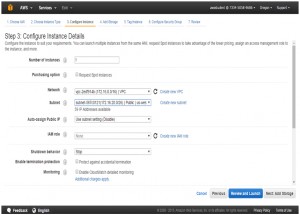
Step 4. Configure Instance Details section where you need to put all the details necessary for your private environment. Select VPC, Subnet, IAM Role, Termination Protection, and finally Static Primary Private IP settings. Click next.
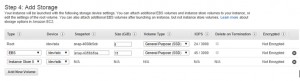
Step 5. Add Storage, here you’ll find storage and their size as you’ve configured for Base-Image. If required any changes in this configuration, please do the change and click next. (Any increament in the volume size other than default storage size, must be extent through LVM to apply these changes.)
(Deploying Instance – without Provisioned IOPS)
Step 6. Tag your instance and click next.

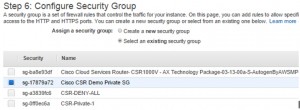
Step 7. Attach a security group if already created, if not then you can create a new security group and attach here. This step can be modified later.
Step 8. Review your configuration and if all look good then go ahead and launch else make changes. It’s done.
Add Comment